Upgrading your bathroom is a rewarding experience, whether you’re remodeling your entire space or just focusing on one element. One of the most impactful yet often overlooked components of a bathroom is the shower screen. The right shower screen not only enhances the aesthetic appeal of your bathroom but also serves practical purposes like containing water and making cleaning easier.
With so many styles, materials, and configurations on the market, choosing the perfect shower screen Sydney can feel overwhelming. This guide will walk you through everything you need to consider to make the right choice for your space, lifestyle, and budget.
1. Assess Your Bathroom Layout
Before diving into styles and finishes, it’s essential to understand your bathroom layout. The position of your shower area—whether it’s in a corner, against a single wall, or in a wet room—will greatly influence your options.
Ask yourself:
- How much space do you have around the shower area?
- Will a swinging door hit anything when opened?
- Is the shower in a confined space, requiring a sliding or bi-fold door?
If your bathroom is small, opt for space-saving designs like sliding or fixed panels. For larger bathrooms, you can explore more luxurious options like frameless pivot doors or walk-in panels.
2. Choose Between Framed, Semi-Frameless, and Frameless
Shower screens come in three main structural types:
Framed Shower Screens
These are the most traditional and budget-friendly option. They have a full metal frame around every edge of the glass panels, offering durability and support. They’re great for busy family bathrooms but can look bulky compared to newer styles.
Semi-Frameless Shower Screens
A middle ground between framed and frameless. These screens have minimal framing—usually only around the outer edge—giving you a sleek look without sacrificing stability.
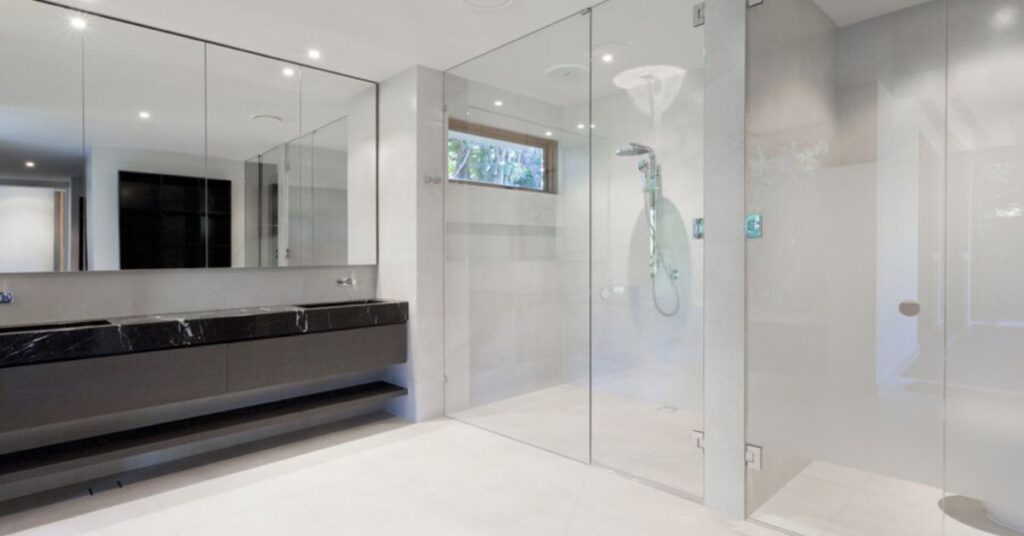
Frameless Shower Screens
Modern and elegant, frameless screens are made from thick, toughened glass and use discreet hardware for support. They’re easier to clean and make your bathroom look larger and more open, but they come at a higher price point.
3. Pick the Right Glass Type and Thickness
Most shower screens are made of tempered safety glass, which is durable and shatters into blunt pieces if broken. You’ll find various glass types and finishes:
Clear Glass
The most common choice, offering a clean and open feel. It’s ideal for smaller bathrooms as it visually enlarges the space.
Frosted or Opaque Glass
Provides more privacy and a softer appearance. A great choice if your bathroom is shared.
Textured or Patterned Glass
Adds a design element while still offering privacy. Perfect for creating a unique focal point in the bathroom.
When it comes to thickness, 6mm to 10mm is typical. Thicker glass (like 10mm) is generally used for frameless designs and offers a sturdier, more luxurious feel.
4. Consider the Type of Shower Door
The shower door style should align with your space and how you use it.
Pivot Doors
Swing open like a regular door, needing clearance outside the shower. Best for larger bathrooms.
Sliding Doors
Glide along tracks and don’t require extra clearance. Ideal for compact bathrooms.
Bi-Fold or Folding Doors
Fold in on themselves, combining the benefits of sliding and pivot doors. Great for tight spaces.
Walk-In Screens
No door at all—just a fixed glass panel. Very modern, open, and easy to access. Often used in wet room-style bathrooms.
5. Think About Cleaning and Maintenance
Let’s be honest—no one likes scrubbing soap scum. So, your shower screen choice should also consider ease of cleaning.
- Frameless designs are easiest to clean since there are fewer places for grime to collect.
- Framed screens may require more upkeep around the edges and corners.
- Consider easy-clean coatings (like nano-coatings or hydrophobic treatments) that help repel water, soap, and limescale, keeping your screen crystal-clear with less effort.
6. Match Your Shower Screen with Your Bathroom Style
Your shower screen should blend seamlessly with your bathroom’s overall look.
- Modern bathrooms often feature frameless screens with matte black or chrome hardware.
- Traditional bathrooms may benefit from framed screens in classic finishes like brushed nickel or brass.
- For a spa-like feel, clear frameless panels and natural stone tiles pair beautifully.
Don’t forget about the hardware—hinges, handles, and brackets can be subtle or bold depending on your design vision.
7. Factor in Safety and Compliance
Always ensure your shower screen meets local building codes and safety standards. In most regions, this means using toughened safety glass that is compliant with national standards (like AS/NZS 2208 in Australia or ANSI Z97.1 in the U.S.).
Also consider:
- Rounded corners to prevent injury.
- Non-slip flooring near walk-in or open showers.
- Water-sealing mechanisms to prevent leaks.
8. Set a Realistic Budget
Prices vary widely depending on the design, materials, and installation complexity. Here’s a rough estimate:
- Framed shower screen: $300 – $700
- Semi-frameless: $500 – $900
- Frameless: $800 – $2,000+
Don’t forget to budget for professional installation, especially for frameless screens which require precise leveling and support.
9. Professional Installation vs. DIY
While handy homeowners might be tempted to install a framed shower screen themselves, frameless or semi-frameless models often need professional expertise. Poor installation can lead to leaks, misalignment, or even shattered glass.
Hiring a professional ensures a proper fit, compliance with safety standards, and longer-lasting performance.
Final Thoughts
Choosing the right shower screen is about more than just looks—it’s about functionality, safety, and how it enhances your daily routine. Take the time to assess your space, understand your needs, and explore different styles before making a decision.
Whether you go for a budget-friendly framed screen or a sleek frameless design, the right shower screen can transform your bathroom into a more functional and beautiful space. Happy renovating!